I’ve been playing Metroid Dread recently (with one finished playthrough under my belt). It’s the first Metroid game I’ve played (though I’ve played other Metroidvanias), and I absolutely enjoyed it. There are many mechanics that I found fun: the combat is simple, yet engaging; the various abilities you unlock are interesting and lead to great gameplay moments; the level design both helps you avoid getting too lost and still lets you feel like you can explore and discover new areas; and the boss battles are tough, yet fair.
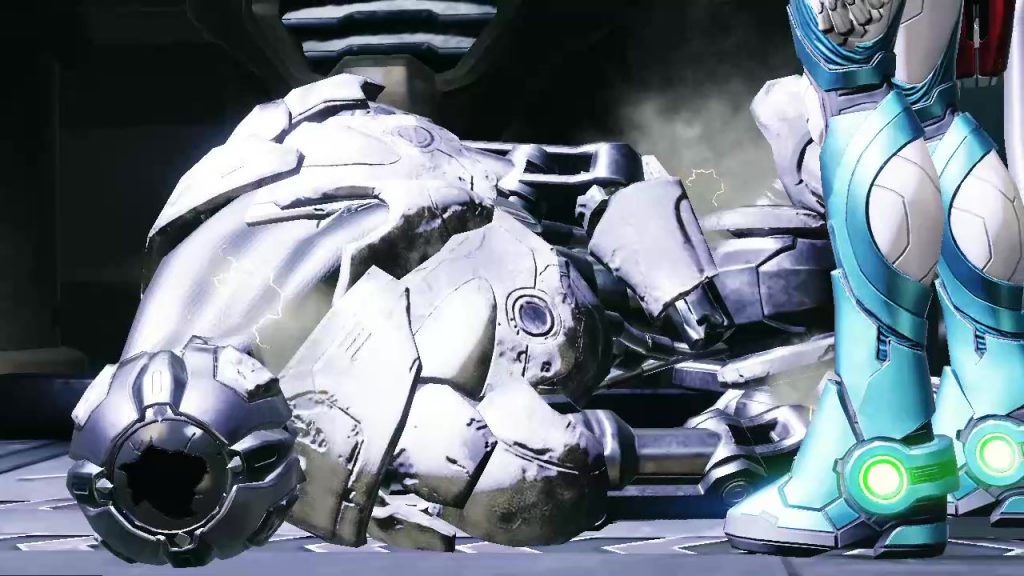
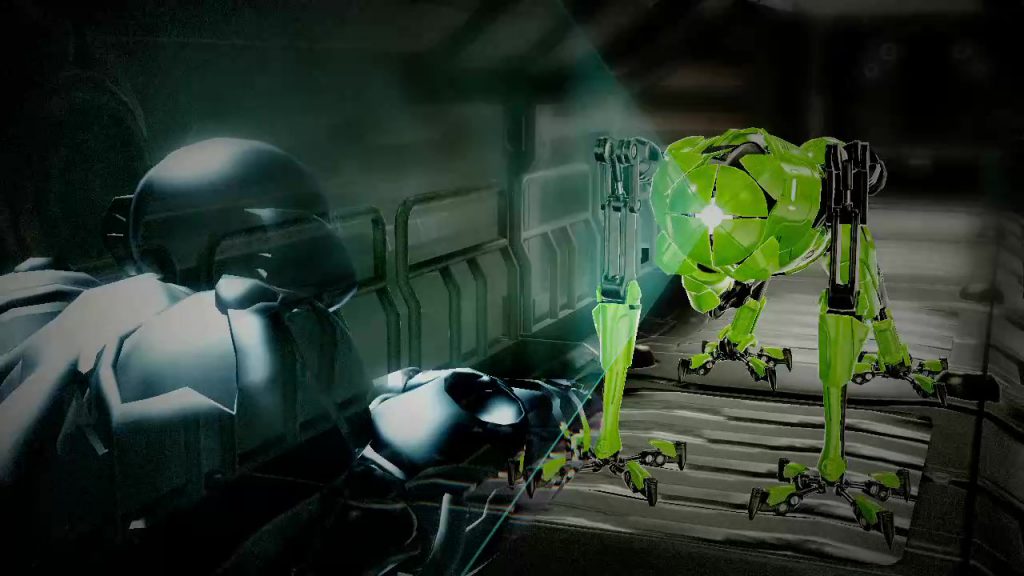
The flagship mechanic, the one that Nintendo advertised heavily, are the EMMI zones. These are designated sections of a map patrolled by a powerful EMMI robot, whose sole purpose is to hunt you down. Your normal weapons can’t hurt the EMMI, so you have to avoid encountering them while moving through their territory. If an EMMI catches you, it kills you unless you succeed on a low-probability counter move. There’s only one way to stop an EMMI for good: finding the energy to power your Omega Cannon, the one weapon you have that can damage them.
EMMI Zones present an action-oriented take on stealth gameplay, and I think they pull the job off well. They’re designed to give you a challenge that you can’t blast your way through, and are crafted such that they don’t put you through too much of their gameplay. In this blog post, I want to examine EMMI zones in two ways: how the game teaches you about the zones, and what mechanics are used to make the zones work.
Note: There will be discussion of some of the abilities you earn throughout the game, though there won’t be any spoilers about the game’s story.
How the Game Teaches You About EMMI Zones
Looking at EMMI zones as a whole, there’s a lot to consider, and it can be a little complex. Metroid Dread spends a good deal of time in the early parts of the game guiding you through the gameplay, using a combination of in-game cutscenes, scripted gameplay, and overt tutorialization. Through these approaches, the game allows you to get used to how EMMI zones work, while still having fun along the way.
The First EMMI Zone
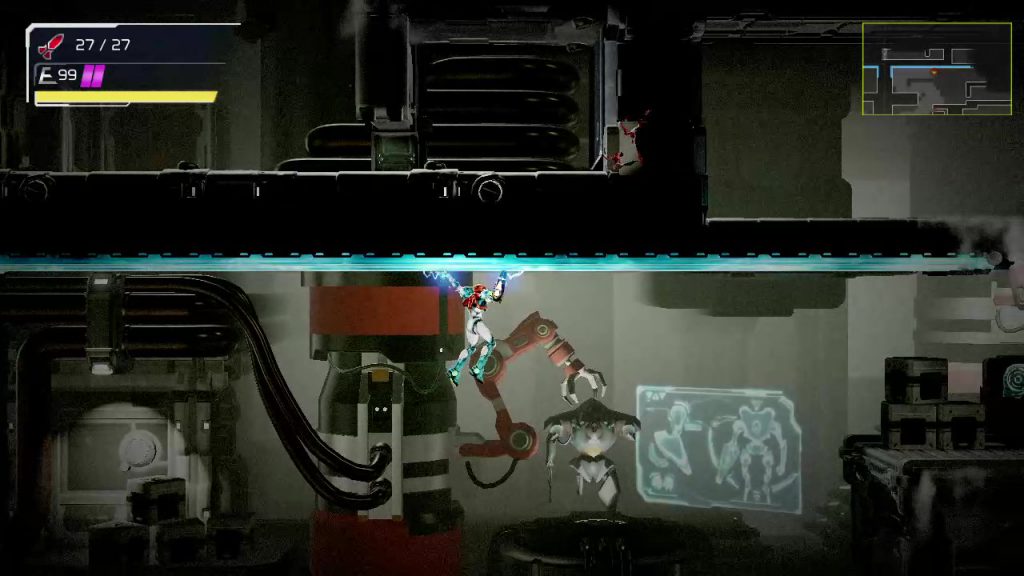
When you first encounter an EMMI, you are shown a cutscene, after which you are given a moment to try and respond to it with what limited abilities you have. The door behind you doesn’t open, and your normal beam weapon and missiles cause no damage to the robot. You are powerless to stop the EMMI from capturing you. At the moment of capture, however, the game pauses, explaining that you have a chance to try and parry the EMMI before it lands a killing blow, and waits to resume until you press the melee counter button. The EMMI freezes in response to this parry, and you are told that you can slide beneath a stunned EMMI. This sequence teaches you what happens when an EMMI catches you, and that you are not powerless to respond to it.
The EMMI recovers from the stun, and you are left to figure out how to run from it. In the next room, the level is designed with a tall wall and platform that you can bounce up and escape. The EMMI is damaged, so even though it tries to follow you, it cannot. The fact that it tries, however, suggests that this is what the other EMMI robots will try to do.
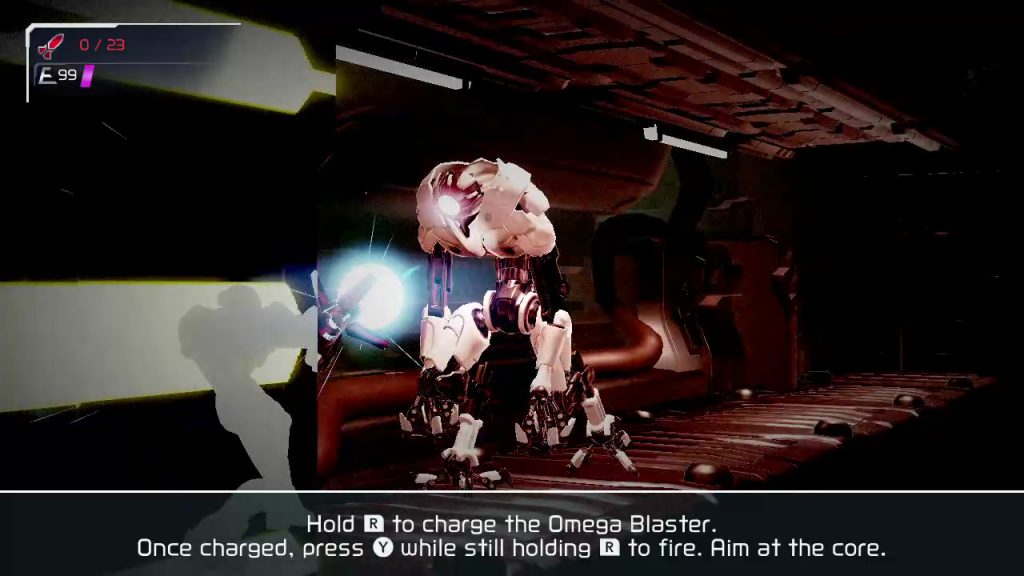
In the very next room is the Omega Cannon, the weapon you need to destroy the EMMI. First, you get a tutorial that teaches you how the Omega Cannon’s charge blast works, by forcing you to use it to open an exit out of the room. Afterwards, you drop back down to face the EMMI, and you have to use the cannon to destroy it and continue on your way.
The Second EMMI Zone
The next EMMI zone is right next to the first one, so you get a chance to try a less hand-held version of EMMI zone gameplay. It starts with a cutscene that reinforces the fact that your normal weapons don’t work against the EMMI (in case you hadn’t realized that, yet). You then have to escape from the EMMI; however, unlike the first one, this EMMI isn’t damaged, so simply climbing up a wall is not enough. You have to evade the EMMI through multiple rooms long until it loses sight of you. This causes it to leave pursuit mode, allowing the EMMI zone doors to unlock and giving you the chance to get out.
From that point, the game leaves you alone, letting you explore more of the world, discovering some new powers and augmentations along the way. The level design forces you to cross back through the EMMI zone multiple times to get to the places you need to go, giving you plenty of experience avoiding the EMMI.
Eventually, you encounter the first Central Unit room, the place where an entity coursing with Omega Energy (the resource that powers your Omega Cannon) is housed. You have to battle this Central Unit, dodging two attacks while blasting the Central Unit with missiles to take down its armored shell and squishy body. Finally, the entity dies, allowing you to siphon its Omega Energy to power the cannon. This time, you are given a second facet to the Omega Cannon: a rapid-fire blast.
As with the first room, the game locks you into the Central Unit’s room and forces you to use your Omega Cannon’s abilities to break out of it. You have to use the rapid-fire to melt the exit door’s heat shield, exposing it to a charge blast which blows it open. This same combination is what you use to defeat the EMMI. This time, when the EMMI dies, you acquire an ability from it, hinting that future EMMI will do the same.
The last major aspect of EMMI zone gameplay comes after you defeat the game’s first boss, where you acquire the Phantom Cloak ability. This turns you invisible for a short period of time. A short briefing explains how the Phantom Cloak can be used to hide yourself from EMMI detection, which is reinforced by a short cutscene when you enter the next EMMI zone, where Samus goes undetected by the next EMMI when she employs the Phantom Cloak.
At this point, you’ve been given the abilities you need to handle any challenge the EMMI zones can throw at you. Along the way, the game gave you a tour of how gameplay within EMMI zones will work, both teaching you through tutorial and allowing you to experiment and try things for yourself.
How do those abilities come together with the rest of the game design to give great gameplay? That’s what I want to examine next.
The Design of EMMI Zone Gameplay
The bulk of gameplay in Metroid Dread consists of exploration, small enemy encounters, and boss fights. Lots of action, lots of things to discover, lots of abilities to unlock progression to other parts of the world. Compared to this run-and-gun style of gameplay, EMMI zones feel tense. You can’t blast your way out of the problem; you have to plan your next moves carefully, with the occasional rapid, improvised escape. This is a good change-up in gameplay, giving you a different style of experience; at the same time, it doesn’t last too long, so you don’t spend too much time under tension, helping you avoid becoming fatigued.
Let’s take a look at the various components which power this experience: level design, evasion, and encounters.
Level Design
There is plenty of great map design in Metroid Dread. Seemingly impossible paths are unlocked by new abilities you discover, clever use of one-way gating keeps you from getting too lost, and many skillful sections conceal power-ups to reward conquering the challenge.
Likewise, the EMMI zones are carefully designed, not just in and of themselves, but also with respect to supplementing the rest of the map design. Each zone is placed on the map such that you are forced to cross through multiple times to accomplish your other goals. At the same time, the EMMI zones are only one part of a larger world, so you aren’t constantly forced to stay long in these high-tension areas. It helps keep the gameplay novel and interesting, without putting too much emphasis on having to play stealthy.
How about the level design within each EMMI zone? By and large, there are two kinds of map design within EMMI zones: large, open spaces where you get plenty of space to move around, and small, narrow corridors that require specific strategies to traverse through safely. While there are rooms within the EMMI zones which are one or the other of those types, often you’ll encounter rooms which mix both types of design together, providing variety in how you plan and execute your evasion. There are also some special areas to help or hinder your approach, including spider magnet walls and ceilings to cling to, pressure plate doors requiring fast maneuvering to blast through, and waterlogged floors that inhibit your movement.
An important aspect of the level design is that it gives you ways to evade the EMMI. When an EMMI has detected your sound, it will pursue your sounds until it finds you or you get far enough away that it stops investigating. The level design supports many strategies for getting out of this pursuit. For instance, you can lead the EMMI off into an isolated part of the map, then double back down a different path to go around it to try and quickly reach your objective. Another way is to take advantage of your mobility to get to areas of the map the EMMI can’t immediately follow you to, forcing it to take another path to get there and increasing the time you have to get out of pursuit range entirely. You just have to look at the map and figure out how best to make your way through safely.
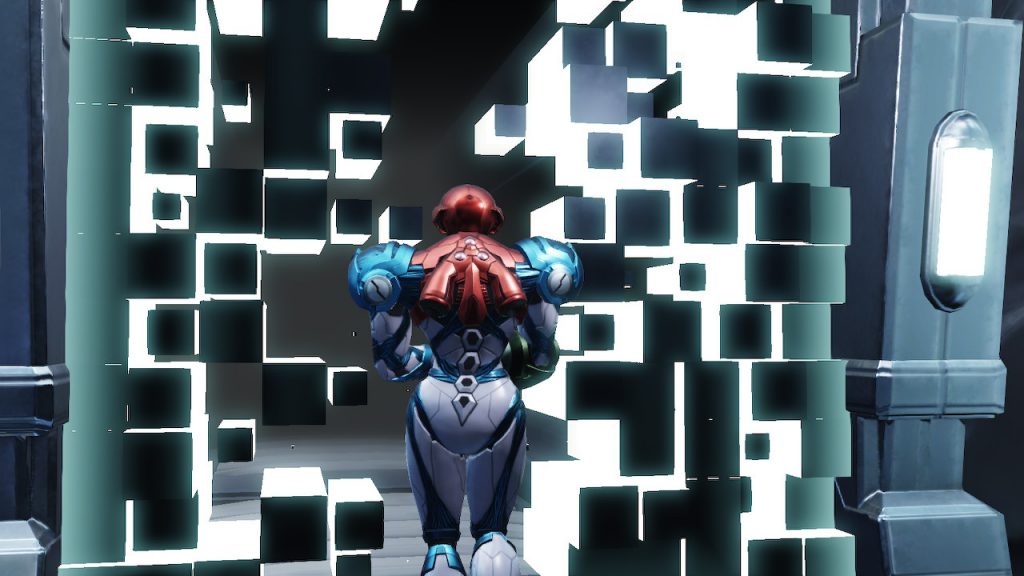
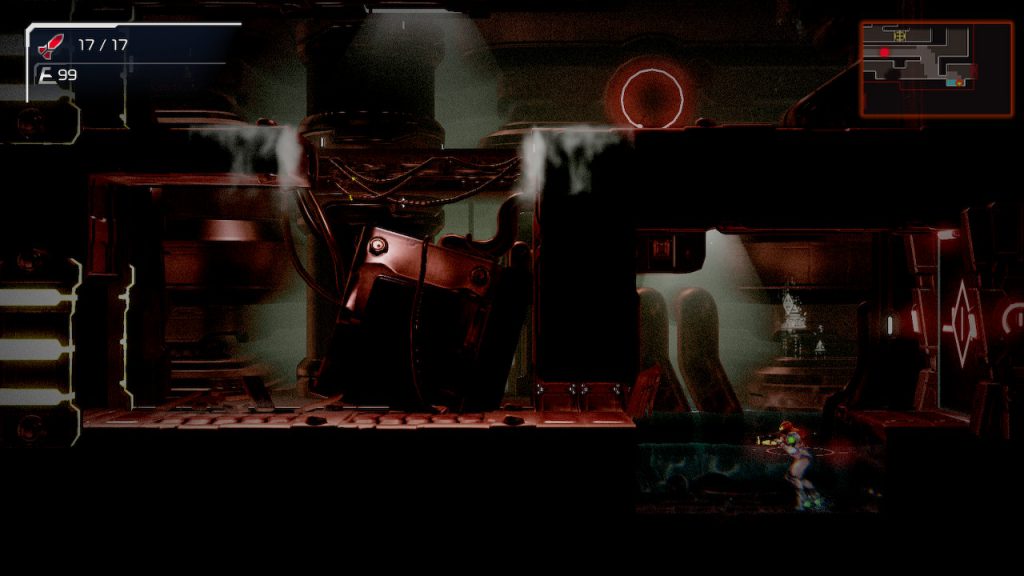
Finally, the visual look of the levels themselves contribute to how the player should feel inside an EMMI zone. While the EMMI is still alive and patrolling, the entire area is grainy and gray, and haunting tones play in the background. Once the EMMI is defeated, the entire area brightens up, the grainy filter is gone, and you hear no more spooky music. Additionally, the world map changes the EMMI zone area to have green backgrounds, indicating you’ve cleared that zone.
Evasion
You can’t hurt the EMMI without the Omega Cannon, and the level design forces you to move in and out of EMMI zones several times before you gain access to the room housing the energy which powers that cannon. That leaves you with two options for dealing with the EMMI while on their turf: running and hiding.
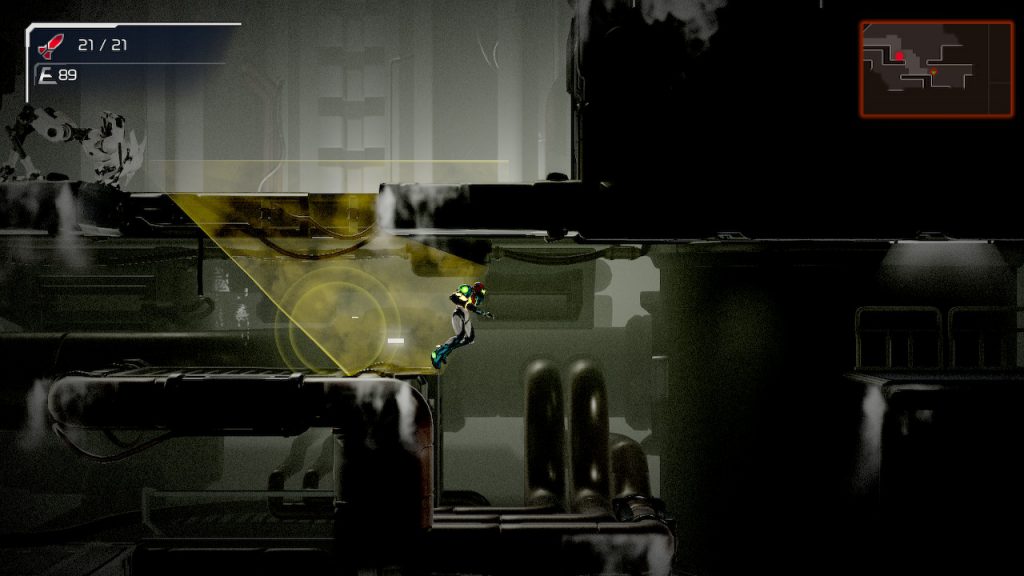
Running is the most obvious solution, and there are various ways the game encourages you to do so and not move too slowly. Your Aeion energy, the ability which powers your Phantom Cloak (and certain other moves) recharges more quickly when you move, so you have to move around at some point to regain your ability to hide. A lot of the map design encourages hiding in a safe spot to plot your next move, then darting over to the next safe spot to repeat the process all over again. The more quickly and carelessly you move, however, the more “noise” Samus makes, increasing the odds that the EMMI will hear you and come to investigate your position. You can risk running for an exit, but if you’re spotted, the EMMI zone exits close until you break the pursuit.
The Phantom Cloak, once you’ve acquired it, allows you to find a spot safe from EMMI wandering and hide from visual detection. While active, it drains your Aeion energy resource, but standing still makes the resource drain significantly less than if you are moving while cloaked. This, along with Aeion energy recharging faster when you move (if you aren’t using an Aeion ability) encourages you to plan your next moves while cloaked, uncloak to execute that plan, then activate the cloak again in your next safe spot to make the next step of your plan. Of course, things don’t always work the way you planned them, and a quick activation of the Phantom Cloak gives you a quick way out of being spotted, hopefully allowing you time to get away from the EMMI threat.
Another aspect of Phantom Cloak is that the game allows it to drain life energy if you run out of Aeion energy while cloaked, and this functions as a risky way to prolong your hidden state. It makes for an interesting player decision: do you continue using the Phantom Cloak and risk losing too much life to deal with enemies beyond the EMMI zone, or do you uncloak and risk the threat of EMMI detection? It presents yet another interesting facet to EMMI zone gameplay.
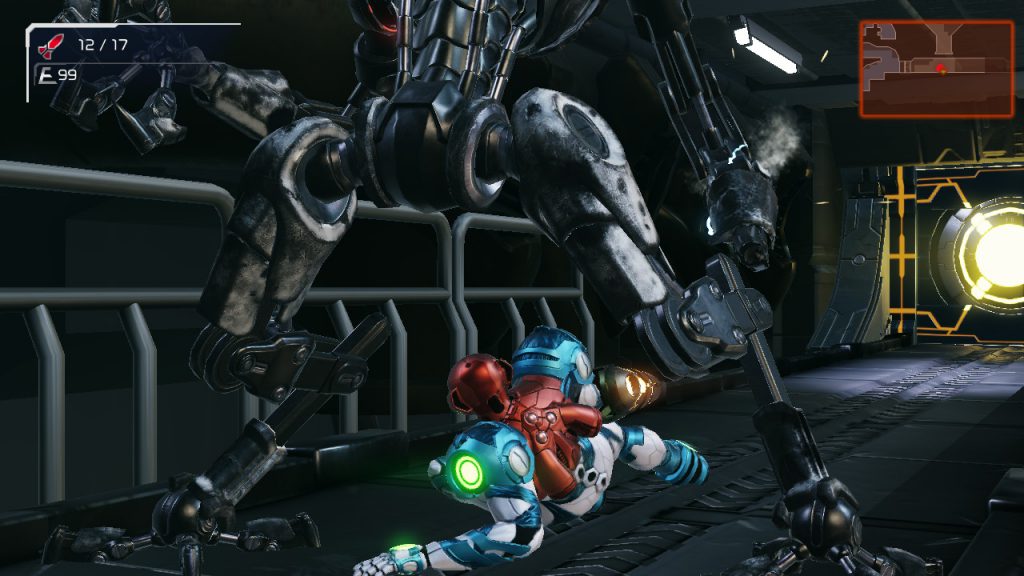
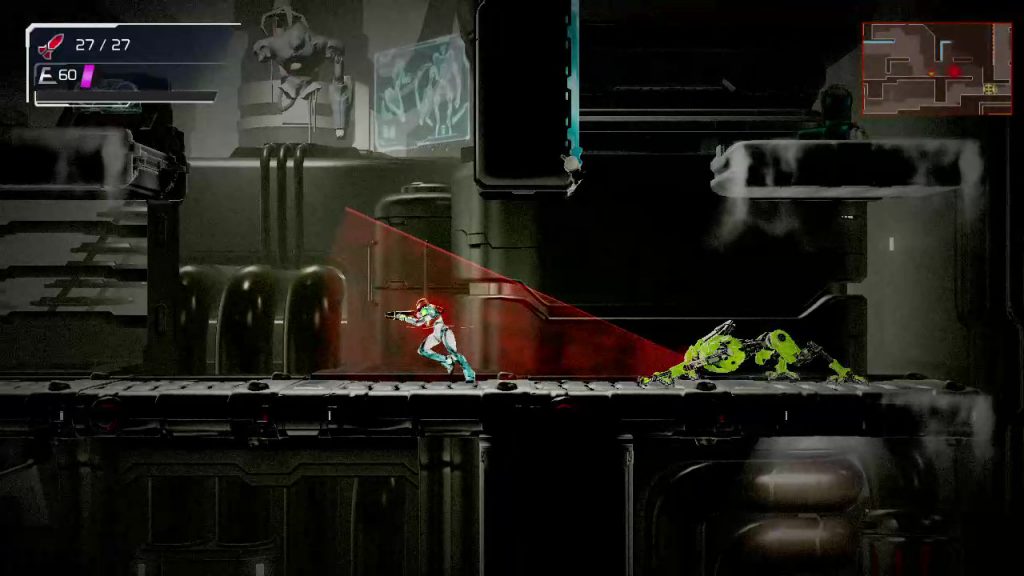
All the decisions you need to make while in the EMMI zone are aided by the information the game chooses to give you while in the zone. If the EMMI is outside of the screen, but close to you to be within the minimap, a red dot appears on the minimap to indicate its whereabouts. Once an EMMI gets close enough to detect the noises you make, a big yellow circle appears on screen to illuminate the precise area within which it can hear you, and while in this area your sound-making movements are highlighted by smaller yellow circles, letting you know exactly what you’re doing to attract the EMMI’s attention. A blue cone is projected from the EMMI’s face, representing the area in which the EMMI can see you, allowing you to react to its sight and do your best to stay out of it. Finally, if it sees you, the cone turns red during the short moment of time the EMMI spends transitioning to pursuit mode, giving you an opportunity to get a head start on your escape.
Engaging the EMMI
Much of the time you spend in an EMMI zone revolves around avoiding EMMI interaction, because to do so risks death. You can’t run from them forever, though. Let’s take a look at the two ways you can directly interact with the EMMI: attacking it with the Omega Cannon, and attempting to escape its grasp when you are caught.
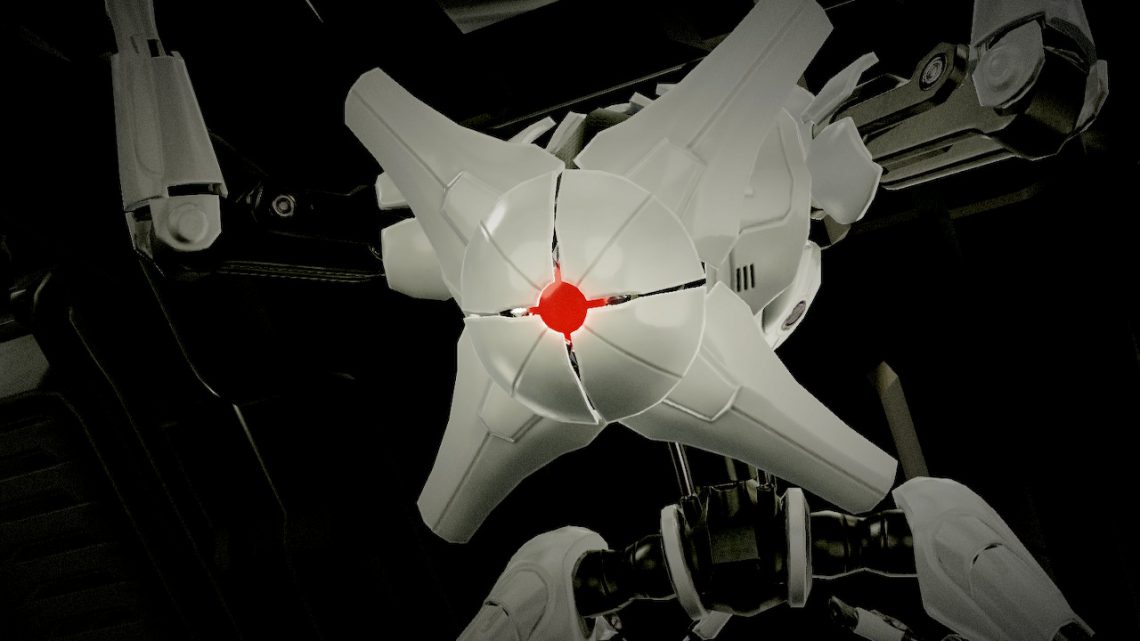
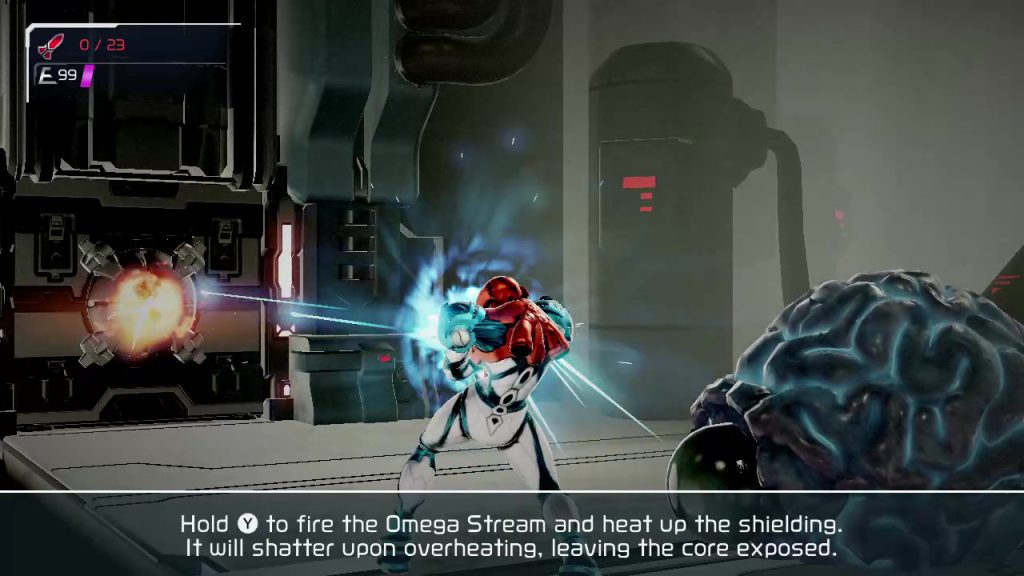
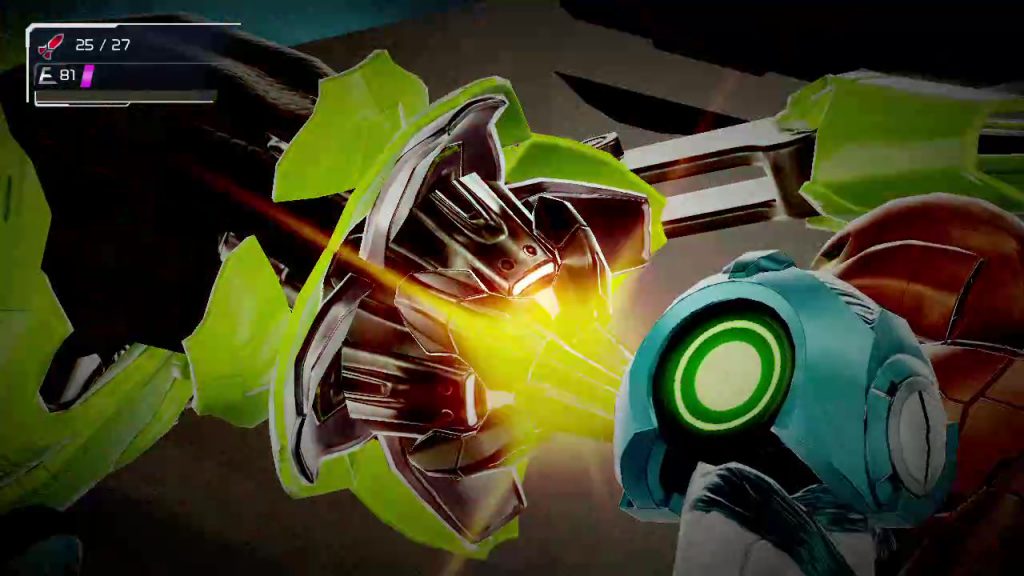
The Omega Cannon has two forms: one gives you a rapid-fire stream of energy bullets, or the Omega Stream, the other a blast with a charging period, or the Omega Blaster. You need both abilities (after the tutorial zone) to defeat an EMMI: Omega Stream is required to take down the shielding on the EMMI’s head, and Omega Blast is needed to take out the core once the shielding is down.
It takes a lot of rapid-fire shots to take the shielding down, so you’ll need to maneuver through the environment to find long stretches of corridor to give you enough time to land enough shots to take down the shield. Oftentimes, the corridor you’re in isn’t quite long enough to completely destroy the shield, so you have to judge when to disengage and move away to avoid getting caught, and subsequently where you’ll move to next to renew the assault. The shield also regenerates if you haven’t taken it down and you stop damaging it, so it’s not as simple as firing a few shots, moving away, and firing a few more shots; you inherently have to take some risky positioning to make sure you do enough damage in one encounter to not allow the shielding to fully recharge by the next time you position yourself to strike.
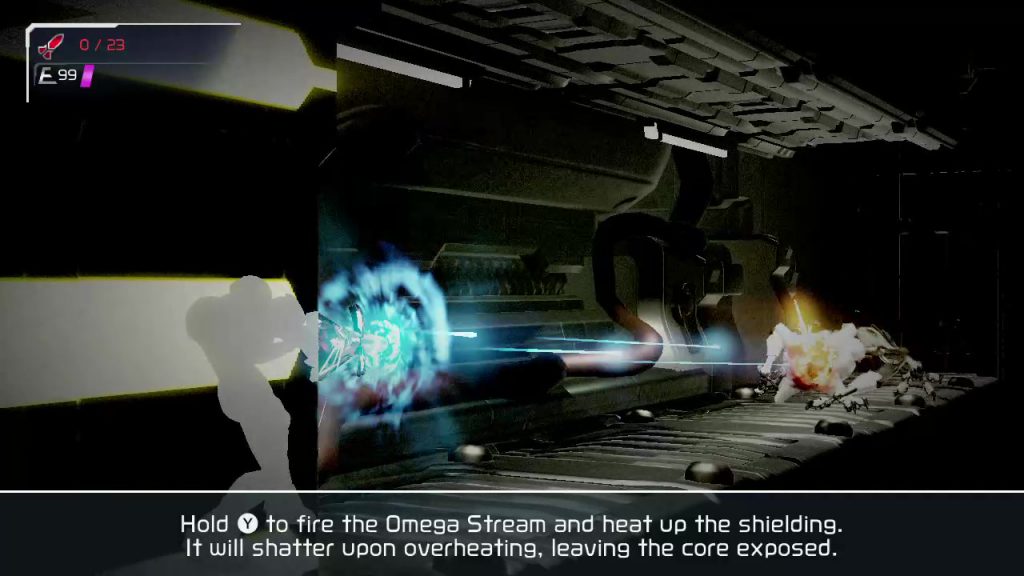
Once the shield is taken down, the EMMI is stunned for a brief period of time. If you’re not too close, you can start charging your Omega Blaster during this period. Otherwise, you once again need to move far enough away that you give yourself enough time to charge up the blast and aim for the head. This can lead to some tense, thrilling moments where you hold your ground and manage to get your shot off just before the EMMI catches you.
Something you’ll need to adapt to is the varying speeds EMMI will use when approaching you. Sometimes, they’ll come at you slowly, giving you plenty of time to damage them; other times, they’ll come at you rapidly, and you may find yourself needing to risk your position to get a few more hits in before you move away. The more you engage with an EMMI, the more of a feel you’ll get for the speeds it’ll employ and when it’ll employ them, giving you more information to use in planning your attack.
What if you are caught? When the game launches you into an EMMI capture sequence, you are given two chances to counter the EMMI’s capture strike: once when it grabs at you, and once more when it goes for the killing blow. In both cases, the timing of when the move happens is randomized, so you essentially have to guess when it’s going to come and hope you guessed correctly. You are told that it is almost impossible to counter these blows, which makes it all the more thrilling when you do succeed in landing the parry and are able to escape the EMMI’s clutches. Most of the time, the counter will fail, but by giving you a slim chance of escape, despite failing most of the time you will still feel as though you had some measure of control over your fate.
As someone who specifically dislikes gameplay where failing at stealth immediately results in total failure, I really appreciated this approach to giving you a chance to get out of trouble, even though most of the time I failed to do so.
Even when the EMMI lands the killing blow and you have to reload, the game spawns you just outside of whichever EMMI zone entrance you came through, instead of forcing you to start from wherever you last saved. This allows you to immediately go back in and try again without having to fight your way back; alternatively, if you want to take a break from EMMI zone gameplay, you can wander off and do something else for awhile before diving back in. This is a great approach to minimize player frustration with failure, by making the consequence of it less severe.
There is also something to be said to having an enemy that constant hunts for you, that you can do nothing about but to evade. The feeling you get when your efforts finally lead to you gaining the power to destroy that hunter once and for all is exhilarating, leaving you fired up and raring to take on the next EMMI.
As shown, there are many different mechanics that come together to make up the EMMI zone experience. From the level design, to the various ways you are given to evade the EMMI, to how you engage the EMMI directly, these mechanics come together to provide plenty of experiences for you within an EMMI zone.
Conclusion
Metroid Dread is an awesome game, in my opinion, and a large contributor to that great gameplay are the EMMI zones. You are taught how handle EMMI zones through a combination of guided experiences, cutscenes, and gameplay. Afterwards, the various game mechanics specific to EMMI zones come together to form a tense, challenging experience that straddles the line between being fun and frustrating.
I think the game would be more boring without EMMI zones, and that is a testament to how effectively they are designed. If ever I want to implement action-based stealth mechanics into my own games, I’ll be taking cues from Metroid Dread’s EMMI zones as an example of how to do it right.