I’ve been making a lot of GIFs lately as part of creating Dice Gun Commando’s pitch deck. I didn’t want to pay for a dedicated tool, and browser-based services don’t cut it, so I cobbled a flow together using FFmpeg and GIMP.
While you can look up how to do it online, the exact process I wound up doing combines enough parts that I wanted to write a tutorial for it. At the end of this, I wind up with GIFs lasting 2-6 seconds and being 5-10 megabytes in file size.
Steps to convert video to GIF
Step 1: Make a video
Whatever process you need to make the source video, do that. For the Dice Gun Commando needs, I record footage with the in-built Windows 10 screen-recording tool; if I need to combine videos, I do that in a video editor (any which allows you to use a timeline should do).
I ensure that the videos last however long I need the GIF to last. 2-6 seconds is usually good enough for my purposes.
Step 2: Convert the video to frames
We need to convert the video to individual frames so they can be imported into GIMP later. I use FFmpeg for this, an open-source video converter. You can get FFmpeg from their website.
Once you have FFmpeg installed, go to the folder where you have the video. Create a new folder to contain your exported frames. I’ll create a gif_frames_example folder for this tutorial; you should name the folder to something that makes sense to you.
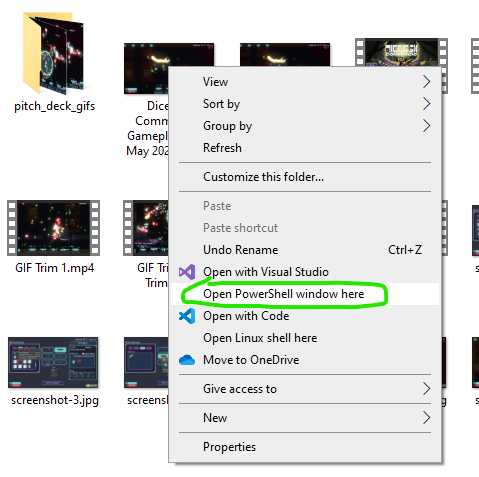
Next, you need to open a command line interface inside the folder with the video. If you don’t already have a CLI, Windows lets you open a PowerShell CLI in any folder by using shift-right click in a folder.
Once you have the CLI open (and ensured it’s in the correct folder), operate FFmpeg using the following command:
ffmpeg -i "video name.mp4" "gif_frames_example/frame-%04d.png"
ffmpeg is the command to run the program.
-i "video name.mp4" is the input source, aka the video you’re converting. The quotation marks are necessary if the video’s name has spaces, to ensure the CLI interprets the name correctly.
"gif_frames_example/frame-%04d.png" is where you’re saving the frame images to. The %04d part allows FFmpeg to name the image files by using a four-digit sequential number (for example, frame-0123.png), and png is the image format you’re saving to.
You could use other image formats by changing the extension, like
.jpg
Hit enter to run the command. FFmpeg should run the conversion in seconds.
Step 3: Import the frames into GIMP
GIMP is an open-source image editing program, similar to Photoshop. You can download it for free from their website.
If your GIMP UI looks different from mine, it’s because I’m still using the 2.10 version of GIMP, which looks different from the 3.x versions. Everything should still work the same way.
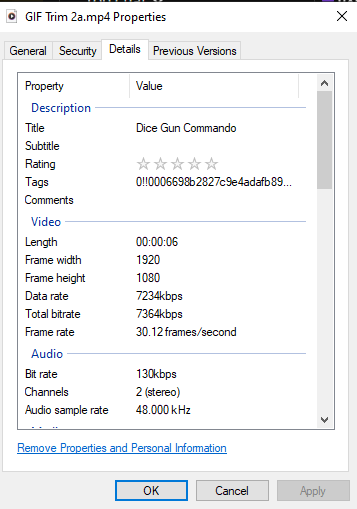
Open GIMP and ensure you’re on a new project, and that the canvas size matches the resolution used in your video. If you don’t already know this information, right-click on the video and view the properties.
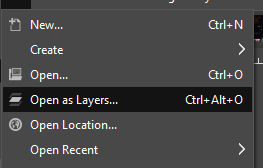
Go to File and select Open as Layers.
Navigate to the gif_frames_example folder (or whatever you named it), shift-select all of the images within, and open them.
By storing all the images in one folder, we can select the first image, scroll to the bottom, and shift-select the last image; this selects all of the images at once.
GIMP will run for a bit, importing each frame image as its own layer.
Step 4: Downscale the image resolution
Right now, the images are the same resolution as what you recorded the video in. We can shave off file size by shrinking the image size to something smaller (we usually don’t want 1920×1080 GIFs anyway). It also makes the subsequent steps much faster!
There’s two ways to do it in GIMP, depending on what you need.
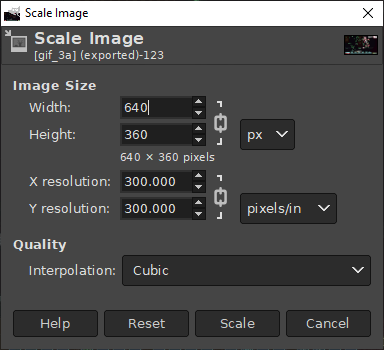
The first approach is to just shrink the entire image. Do this via Image/Scale Image.
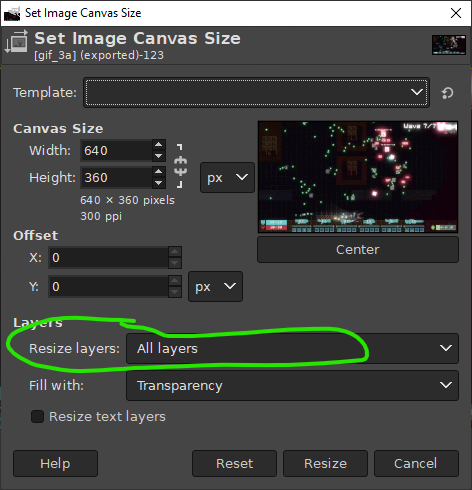
The second approach is to change the Canvas Size and resize all the layers in the process. This is useful when you want the GIF to focus on a small part of the overall image. Do this via Image/Canvas Size.

Step 5: Optimize the color palette
We can save more file size by reducing how many colors the images use. Most people won’t be able to tell much difference between 255 colors and 16000 colors!
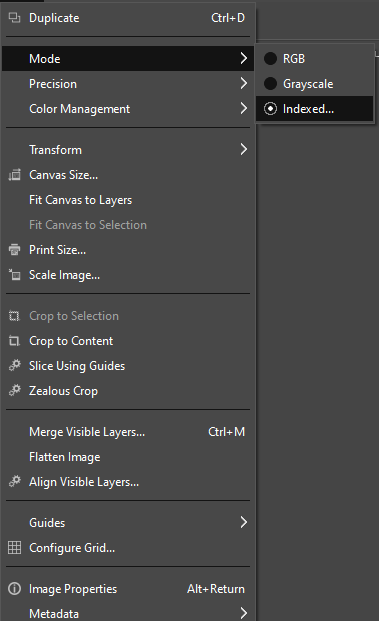
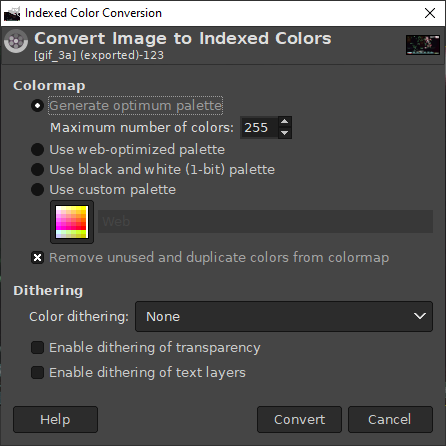
Do this in GIMP via Image/Mode/Indexed, then choose Generate optimum palette from the menu. Set the maximum colors to whatever seems reasonable (I chose 255).
GIMP will run for a bit, but should be done in a minute or two.
It takes way longer when the image resolution is larger. That’s why we shrank the image first!
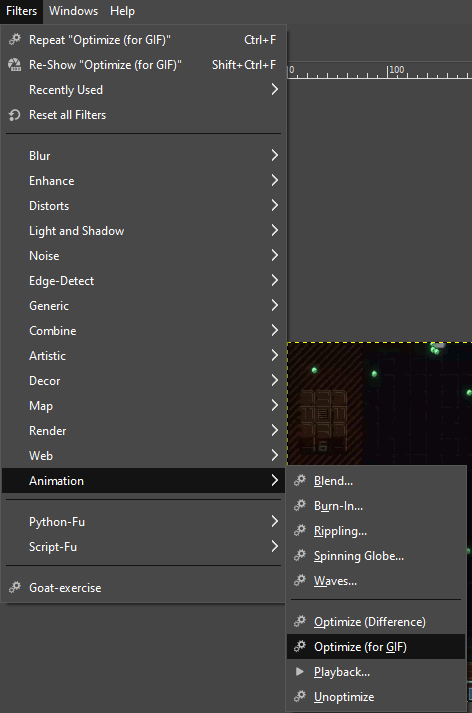
Step 6: Optimize for GIFs
GIMP has a filter called Optimize (for GIF). What this does is go through each frame in your gif and remove all pixels that didn’t change between this frame and the previous frame. This further reduces how large the GIF needs to be, and doesn’t noticeably change the final visuals.
Apply the filter via Filters/Animation/Optimize (for GIF).
GIMP will need a few more minutes to run this.
Step 7: Export as GIF
We’re finally ready to export the GIF!
Go to File/Export As, then type gif_frames_example.gif (replacing gif_frames_example with your chosen filename). Make sure the file name ends with .gif, as that is what tells GIMP you want to export a GIF!
Once you hit Export, you should see a menu pop up, allowing you to configure the export.
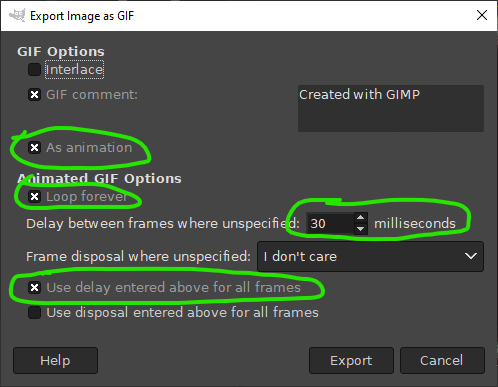
Ensure As animation is checked, as that gives you access to the other options.
Check Loop forever if you want the GIF to loop.
Delay between frames allows you to specify how fast the frames change. Set this to match the frame rate from the original video if you want the GIF to play at the same speed. (Or, tweak it if you want it to be faster/slower).
Finally, Use delay entered above for all frames forces that frame rate to be the same for every frame. Otherwise, it uses the format specified when you ran Optimize (for GIF) (which is 100ms).
Pressing Export here does the export. If you configured everything correctly before, this should only take a few seconds, and should produce a GIF that is in the 5-10 megabyte range.
That’s All
Let me know if this helped you!
Also, if you want to see Dice Gun Commando, check it out on Steam!
