This is Part 1 of a 3-part series. Check out all the parts here!
Part 1: This post.
Part 2: Here!
Part 3: Here!
As a child, I loved to play Donkey Kong Country 2: Diddy’s Kong Quest; as an adult in my early thirties, I still love playing it. One of the reasons, among many, why is the game’s character movement feels almost perfect. Never do I feel as though I can’t adequately control Diddy or Dixie Kong as I navigate them through many levels of perilous adventure. As a game designer, I found myself wondering: what is it, exactly, that makes me love DKC2’s movement so much?
To begin answering that question, I’ll take a close look at the action verbs DKC2 employs related to the player characters. It’s not just a matter of analyzing the actions and movements in and of themselves, however; the level and enemy design of DKC2 are intentionally crafted to augment those basic actions. As is undoubtedly true for many games, it is the whole package together which creates that feel I love so much.
To break this lengthy dissertation into digestible chunks, this will be a three-part series. We’ll open up with a look at the basic movements and abilities of the Kongs themselves, as well as some special moves that are used to spice up the normal gameplay. After that, we’ll examine how the levels are designed to take advantage of the basic and special moves. Finally, we’ll look at the enemy designs and how those compliment the basic moves and abilities as well.
Kong Kapabilities
To begin this design dissection, we’ll look at the many forms of movement present for the Kongs in DKC2. First up: the core action verbs. Each Kong possess a base set of moves that you’ll be employing throughout the majority of the game.
Walk and Run
You have two basic ground movements, one for walking, and one for running. Diddy’s speed is slightly faster than Dixie’s, for both walking and running, but both feel fast enough that I don’t feel particularly disadvantaged when using the slower Kong. The actual movement speeds themselves feel just right to me; I’ve never found myself wishing that I could move faster or slower.
Triggering the run and walk actions are simple: hold the Y button and a direction to run in said direction; don’t hold Y, and that same directional input is a walk. Personally, I always appreciate it when games give me the ability to walk when I want to, even if most of the time I’m probably going to run. Having an easy-to-use slow option gives me that more precise control when I feel like I need it.
For 3D games, having easy walking also lets me get more immersed in the fantasy of inhabiting a character in a world. No one runs all the time in real life!
Accelerating from a standstill to a walk is near-instantaneous, which further helps with making the Kongs easy to control, but there is just enough acceleration that you don’t feel the characters instantly transition from idle to walk. Running, on the other hand, only happens after you press the Y button, which triggers the controlled Kong’s spin move before transitioning to the run. That animation helps convey a reason for why the character is suddenly transitioning to a run speed, while also giving you an attack move which is easy to trigger. If you were holding Y and start moving from idle, though, you just accelerate briefly into the run speed; again, just enough acceleration to make it not instantaneous, but short enough that it doesn’t impact your control over the character.
Speaking of spin maneuvers…

Spin
Both Kongs have a spinning maneuver, but each does it differently. The execution of both spin maneuvers result in the same outcome, however: pressing the Y button causes the Kong to perform a spinning attack move, which is capable of defeating most ground enemies; if Y is still held, then any directional ground movement will subsequently result in the Kong moving at a running speed.
As mentioned, the Kongs each have their own spin on the spin maneuver. Diddy’s is a cartwheel, looking quite acrobatic, while Dixie’s is a body spin, twirling her pony tail (termed by the game as a “helicopter spin”). Interestingly, Diddy’s cartwheel looks like a more natural action than Dixie’s, which can contribute to his move feeling faster than Dixies, but in fact both spin at the same speed and move the same distance, which means you aren’t disadvantaged when faced with level sections which ask you to use the maneuver.
Dixie’s helicopter spin serves a second purpose while in air: pressing Y while in midair causes Dixie to spin constantly, giving her a slower fall speed, and thereby giving the player greater control over where they want to land. Diddy does not have this ability, which helps give both Kongs distinct roles: Dixie is useful for air control, while Diddy is useful for moving more quickly.
Jump
An essential ingredient to most 2D platformers is the jumping action, and both Diddy and Dixie are more than capable of performing this function. Pressing the B button causes the selected Kong to jump into the air, up to approximately three times their own height. Tapping B causes a short jump, while holding B slightly longer results in a higher jump. While it may seem pointless to have this scaled jumping, having some control over your jump height makes you feel more in control than you would if you only had a single jump height.
There is more to the feel of the jump than the upward movement. Running and jumping allows you to cover more horizontal distance than walking and jumping, providing more encouragement to run through the levels. While in the air, you have full control over horizontal direction, giving you the ability to precisely place where you want to land and making air control feel responsive. When you fall, you accelerate to a constant speed, which you maintain until you hit the ground (or the enemy on it), which makes it easier to predict where your jumps will land.
Interestingly, it seems that your fall speed is the same as your jump speed; it takes the same amount of time to fall from the apex of your jump as it does to jump up to it. However, if you are moving in a horizontal direction while in midair, it seems to slightly increase the amount of time the Kong stays at the apex of the jump. This is something I only noticed when going through my recorded footage frame-by-frame to try and get ballpark estimates, but now that I think about it, this gives you a little more time to figure out where you want to land before you start falling. It’s a clever design, one that I hadn’t thought about before.
Most enemies can be defeated by jumping on them, and this jump attack is something you’re going to do a lot throughout the course of the game. The game encourages you to do this by giving you a greater jump height when you jump off the top of an enemy than when you jump from the ground, allowing you to cover greater distances. Even if you don’t actually jump off the enemy, landing on one grants you a small bounce acceleration that still lets you move up and onward. These movements help make bouncing off an enemy feel good.
The spin moves also have a role to play in performing jumps. While spinning off of a ledge, you can press the jump button (B) to cause the Kong to jump while in mid-air. This allows the Kong to cover more horizontal distance than they’d be able to cover by simply running and jumping. The timing on this is fairly forgiving; the game doesn’t want to impede you from pulling this maneuver off.
Duck
It’s easy to forget about the ability to duck, as it’s a passive move compared to walking, running, spinning and jumping. This move causes your Kong to duck down and hold still, effectively decreasing their vertical hitbox size by about half. This is used to less effect than other moves, but there are still places that will require you to duck under passing enemies, so it has a part to play in the movement design.
Team Throw
Finally, you can pick up your partner to put them on your Kong’s shoulders, then subsequently throw them by pressing Y (the normal throw button). If you hold the up direction as you throw, this results in launching your partner up into the air in a slow, controllable way; without this, your partner Kong is simply thrown to the ground, remaining where they fell until you come back for them (or they go off-screen, in which case they run back to you automatically). The horizontal throw can also be used to defeat enemies that could be defeated with normal attacks.
Special Skills
Now that we’ve discussed the basic Kong moveset, let’s examine cases where the game modifies these default maneuvers to introduce other forms of gameplay. These serve as an occasional change-up to how the game flows. Just as with basic movement, the feel of these special movements is important.
Climbing
Throughout various levels, ropes are placed, which the Kongs can climb when you leap into them. While on a rope, your movement is restricted to a single plane, either horizontal or vertical (depending on which way the rope faces). Diddy and Dixie’s different movement speeds factor here as well, with Diddy being able to traverse ropes slightly faster than Dixie.
Keeping the rope climbing speeds fast, close to their walking speeds, means that it doesn’t feel like the game slows down during the climbing sections, so they still feel good to move around on. This, in turn, makes it fun to navigate through the various challenges the designers place along the paths the ropes and chains force you to traverse.
Swimming
In some levels, there are water sections that the Kongs can swim in. Jump and spin attacks can’t be performed underwater, so the gameplay changes from defeating enemies to avoiding them. While underwater, you are able to move in all directions, but you sink downward unless you tap the B (jump) button to swim upward.
Like the climbing sections, your movement speed underwater is close to your regular movement speed, although the requirement of tapping the B button makes swimming more skillful than simple navigation; you have to time button presses to keep yourself afloat while swimming past enemies. Unlike the climbing sections, swimming sections allow you unrestricted horizontal and vertical movement, adding yet another flavor of movement variety to break up the rote platforming that dominates most of the game.
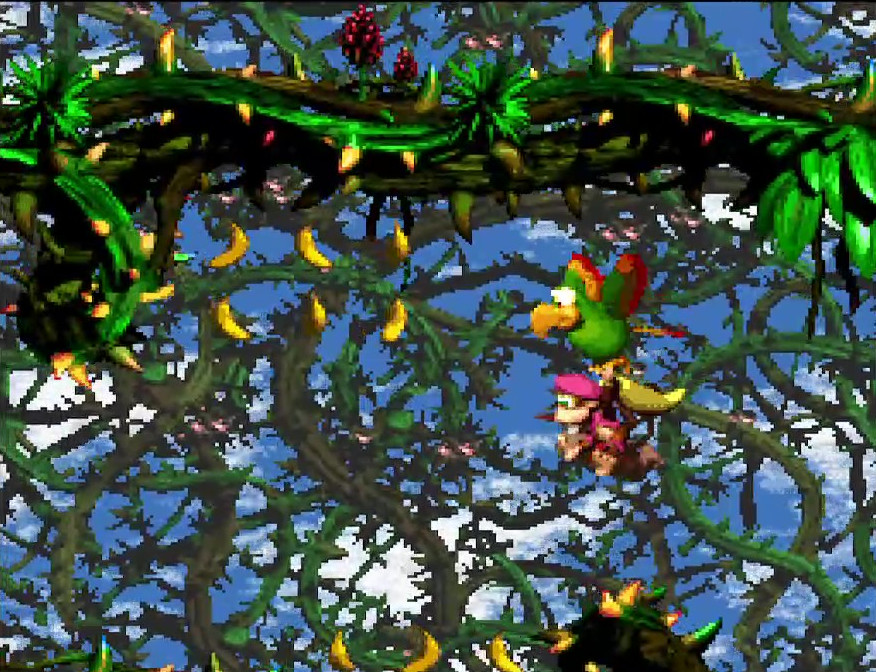
Flying
Some levels give you access to the Squawks animal buddy, a parrot that grants the Kongs the ability to fly. The flying sections are similar to swimming sections; you can move in all directions, but have to continuously tap B to move up or you float back down to the ground.
The similarity in how swimming and flying sections work from a movement standpoint allows for the designers to reuse player expectations for how those mechanics work, and avoid having to teach yet another new mechanic.
Speaking of animal buddies…
Animal Buddies
These are animals that the Kongs can ride (or, in some cases, transform into), and using an animal buddy changes what moves the player can perform. With all the animal buddies, there are similar base movement motions: there is a slower “normal” speed, and then a faster “running/swimming/flying” speed when moving while holding down Y. Beyond that, however, each animal introduces different changes to the movement equation.
Animals can be accessed in two ways. One is through a crate, in which case the Kongs ride the animal. While riding the animal, taking damage causes the Kong to fall off and the animal to run away; you can also choose to dismount the animal willingly. The other is by transforming into the animal itself. Dismounting the animal is no longer an option, so you are stuck with that animal’s movement changes. Usually, transformed mode is given when the level’s design explicitly requires that particular animal’s movements to progress through the level.
Either way, at some point in the level you’ll reach a “no-animal” sign, which removes the animal buddy and gives you some kind of reward. By giving an end to the animal buddy use, this allows for only having some parts of the level be designed around the use of the animal, and in some cases even have multiple animals within the same level. It makes the animal buddies another tool in the player’s movement arsenal.
Let’s take a look at the animals and what their movements add to the gameplay.
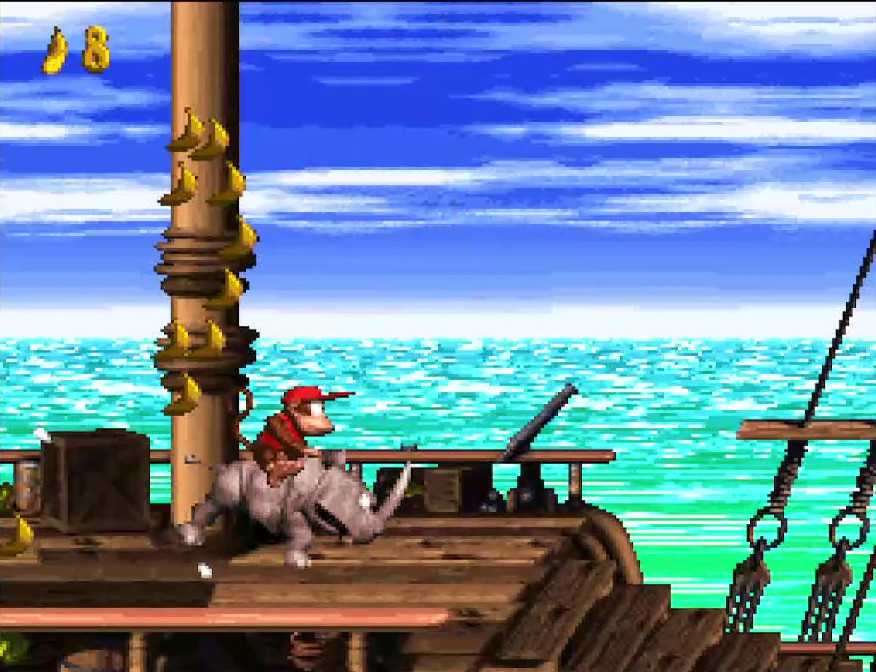
Rambi
A rhinocerous that gives you a faster running speed. Rambi is impervious to damage when jumping on enemies or running into them with its horn, only being vulnerable to attacks from behind (and certain projectiles). Holding down A prepares an even faster run in the direction Rambi is facing, plowing through enemies and breaking through hidden entrances to bonus areas.
Riding Rambi makes you feel almost invincible, so you feel more willing to move fast and make risky decisions. Enemies are mostly no longer a challenge for you. These things combined make Rambi feel amazing to use. To account for this, oftentimes Rambi’s location in a level is hidden, making finding him a reward for looking around the levels, rather than blazing through them.
Enguarde
A swordfish that gives you full movement control underwater. No longer do you need to tap B to stay afloat; Enguarde hovers in place when idle, and moves in whatever direction you input. The sharp-looking bill on its face can defeat any underwater enemy, and clearing enemies makes the underwater sections that much easier.
Having Enguarde removes a lot of the challenge from swimming movement, which means riding Enguarde feels similar to riding Rambi, in that you feel more free to move where you please, with ease. Since Enguarde makes underwater movement and gameplay much easier, his locations, like Rambi’s, are hidden well in the level, so that finding and using him is a reward for good exploration.
One could think of Enguarde as the underwater version of Rambi.

Squawks
As mentioned, Squawks is a parrot that gives you the ability to fly in a stage. Unlike Enguarde, you don’t get to hover in place when idle, so there is still challenge involved with using the bird. Squawks also has a ranged attack, hurling eggs out of its mouth in a parabolic trajectory when the Y button is pressed.
Unlike Enguarde, who generally makes level movement easier, Squawks requires more care to ride. Any contact with an enemy damages Squawks, so you are required to be careful as to where you fly. The egg projectiles don’t fly straight, so aiming them to hit enemies, while maintaining flight, is in and of itself a challenge for the player. As such, Squawks is often placed in locations that are easier for the player to find.
Squitter
Squitter gives you the ability to shoot webs. Pressing Y delivers an attack web which can defeat any non-invulnerable enemy; you can control the arc of the shot by holding up or down on the direction input after the attack web has been fired. Pressing the A button (or, alternatively, either the L or R buttons) shoots a slow-moving platform web. Pressing the platform web button again after firing deploys the web platform, giving you something to stand on in mid-air. These platforms disappear after a short period of time, however, so you need to move quickly. Unlike other ground animals, Squitter cannot defeat enemies by jumping on them, so you need to keep away from foes and blast them from afar.
From a design standpoint, Squitter is a massive change to your movement toolset. Riding him takes away your ability to jump on enemies, but gives you an infinite amount of projectiles, making you adopt a long-ranged approach to defeating enemies. Creating platforms at will allows you to avoid hazards, pitfalls, and enemies that would otherwise prove difficult or impossible to overcome; they also provide an interesting way to add more vertical movement to the regular platforming action.
Rattly
This snake has an extremely high jump, allowing you to reach higher platforms than you could with the Kongs by themselves. Holding down A charges Rattly to make a super-jump, similar to how holding A charges Rambi to make a super run. Rattly defeats any enemy that it jumps on, except for ones that are invincible. Interestingly, when Rattly moves along the ground, movement consists of small jumps that result in a lurching style of movement; this is perhaps an encouragement to move by pressing the jump button, which feels more fun to do.
Rattly is all about the jump. He can jump on nearly anything and live, and, since your spin attack is taken away while riding him, you are strongly encouraged to jump on foes in your path. The high jump allows for adding taller sections to levels that take advantage of that bigger jump height.
I am leaving out Glimmer and Clapper because they do not change your movement mechanics.
Careening in Carts
Three levels let you ride in carts. While in a cart, the Kongs move in a consistent rightward direction at a controlled speed (you can go faster by holding the forward directional input, and slower by holding back). Depending on the level, jumping will either cause both Kong and cart to jump, or just the Kong. With the consistent movement, beating these levels is about reacting to upcoming threats quickly; you aren’t given time to ponder your next action. This can be frustrating while learning the level, but it results in satisfying rushes once you consistently react correctly to the level’s challenges.
What does this sudden change in movement bring to the design table? The rush of speed, for one. It’s fun to move fast through a level, much faster than you normally get to move. Along with that speed comes reduced amounts of time to react to level hazards. You can’t stop to figure out how to get past those hazards, either; you’re hurtling at them at high velocity, and you have to make quick choices about how to get past them. This is hard, but exhilarating, and they add a health dash of experiential spice to the movement gameplay.
These cart levels are ones I loved playing as a kid. That said, I think it’s good that there aren’t many of these kind of levels, as the high tension throughout would make level to level gameplay far more exhausting if that was the majority of the action.
Tossing in Throwable Objects
One final Kong ability remains: throwing objects. Both Kongs are capable of picking up and holding barrels and other objects placed throughout the level by holding the Y button; releasing the Y button causes the Kong to throw the projectile, which will defeat any enemy that it touches along the flight path. Aside from certain animal buddies, this is the only ranged attack you have access to in the game.
In many cases, the objects will break on impact, whether with the world or an enemy, making them a single-use resource. This forces you to consider carefully when you encounter a projectile to throw; should you use it now, on the nearest enemy, or should you try to hold on to it to use on some future part of the level with a more difficult obstacle, or a bonus area entrance? Your movement isn’t impeded while holding a barrel, so you still have the same level of control that you do normally; however, since objects break on contact, and you are forced to throw the object when you jump on an enemy, holding on to a projectile you wish to keep intact transforms the gameplay from defeating enemies to avoiding them until such time as you wish to use the projectile. This is a great way to subtly introduce a change in gameplay.
Interestingly, I always thought in my mind that you moved slowly while holding on to a barrel, but in testing I found that this is actually not true; you still move the same amount regardless of whether you’re holding an object or not. This is an interesting psychological effect; I wonder if the designers intended it, or if it was just a byproduct of our expectations for movement with held objects.
What if you don’t want to hold the projectile right now, but still need to keep it around? You can hold down and release Y to set the object back down on the ground, where it will wait for you to collect again. If you move far enough to cause the object to go off-screen, however, it resets its position back to where you found it; while this was probably something introduced by the technological limitations of the SNES days, rather than a design decision, it’s something you still have to consider when setting the object down.
The way in which Diddy and Dixie throw projectiles differs for each. Diddy picks up objects with his hands and throws them in a flat, shallow arc that is almost effectively a straight line; Dixie picks up objects with her ponytail (boy, her hair can really defy the laws of physics, can’t it) and throws them with a more pronounced arc. Because her hair is on her head, the release point of projectiles Dixie throws is higher than Diddy’s, resulting in making it easier to hit enemies that are up in the air. Both Kongs are able to jump while holding objects, which provides additional control over where the projectile is thrown. Since Diddy’s throw starts lower to the ground, jumping and throwing is almost essential when throwing with him to get good distance. Giving the two Kongs different throwing styles further differentiates between using the two Kongs, making it useful to have both around to switch up which one you use for a given situation.
There are many kinds of objects the Kongs can throw throughout their journey. Each kind of object provides different characteristics that affect player strategy for using them.
Barrels
This is the bread and butter projectile of the game: a simple, metal-banded wooden barrel. You can throw it normally, which will fling the barrel forward and cause it to break on impact with the ground (plowing through however many enemies were in its way), or you can heave it upwards into the air, which will cause it to land softly enough to not break on impact, and subsequently will roll along the ground (and through enemies) until it hits a wall or falls off a ledge.
Crates
Crates, on the other hand, are square projectiles that clearly communicate that they won’t roll. They also break on impact, regardless of how you throw them, making them a much more limited resource.
Buddy Barrel
The buddy barrel contains your partner Kong, if you lost them at some point during gameplay, and when the barrel breaks open you get your partner back. Interestingly, the buddy barrel’s impact mechanics are similar to the crate, in that it breaks immediately on impact with the ground or with an enemy, so when there is no Kong in the barrel the two objects are pretty much the same, functionally.
Cannonballs
These spheres of solid metal do not break on impact with anything, but they also do not roll when they hit the ground. Because of their indestructible nature, they are useful as reusable projectiles or shields for as long as you can keep from throwing them into a pit.
Chests
Chests break only on impact with enemies (or bonus area entrances), and they contain some form of beneficial pickup (or “goodies”) which gives you something of value, from banana bunches to life balloons (extra lives) to Kong letters, and everything in between. Since they don’t break on hitting the ground, you pretty much have to use them on enemies, which means you’ll have to find an enemy to use it on or you won’t be able to break it.
TNT Barrels
The holy hand grenade of DKC2, these explosive barrels are capable of destroying any enemy in a fiery explosion. This explosion has a small radius that will destroy any other enemies it touches. This barrel is often the only means you are given to deal with invulnerable enemies, which means being given one can be a sign that such an enemy is coming up.
To Be Kong-tinued
We’ve taken a deep look into the movement of Donkey Kong Country 2. From the simplest, basic moves to the variations introduced by special abilities, controlling the Kongs feels tight, responsive, and fun. But having characters that move well is only part of the gameplay story; the environments the Kongs move through and the enemies they fight contribute just as much to the feel of the movement as the movement itself.
In the next part of this series, we’ll take a dive into the level design of Donkey Kong Country 2, and see how much it impacts how the movement feels. Stay tuned!
This is Part 1 of a 3-part series. Check out all the parts here!
Part 1: This post.
Part 2: Here!
Part 3: Here!
No Comments